Git
(If you have already signed up) Read the moodle first
The Moodle pages of the course contain important information which you should read before studying these pages, including information about the aims of the project and its grading. The moodle pages also link to the most relevant parts of these pages. These pages expect you to be familiar with the contents of the moodle and can feel confusing if you are not.
Original instructions by Mika Huttunen and Silja Polvi. Jeremias Berg has updated the instructions.
Getting Started
DO NOT use the Git plugin provided by NetBeans or any graphical programs. So far, all problems in this course where students have lost a day’s coding work have been caused by these. Always use the terminal in Linux/OSX or Git Bash in Windows, and perform commits and pushes manually.
First, check if Git has been installed on your computer by running the command git -v in the terminal. The output should look something like this:
jezberg@LM2-500-27156 ~ % git -v
git version 2.39.3 (Apple Git-145)
If you receive an error message (e.g., “command not found”), first install Git by following the instructions on this page.
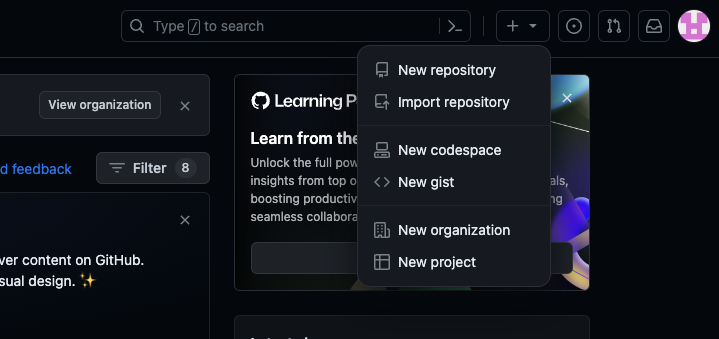
After installing Git, create a GitHub account (personal, not enterprise). Once your account is created, you can create a new repository by clicking the “+” symbol in the top right corner and selecting “Create repository.”

Name the repository according to the topic of your project. Select “Public”. If you want to complete all the repository management exercises on this page, check the box “Add a README file”. You can also choose a “.gitignore” file suitable for your programming language (more about .gitignore below).

Generating an SSH Key on Your Computer
Follow the instructions here.
Preparing the Repository for Use
NOTE: In this guide, “command line” refers to the terminal on Linux and Mac, and Git Bash on Windows! Windows’ own command prompts do not recognize Git commands.
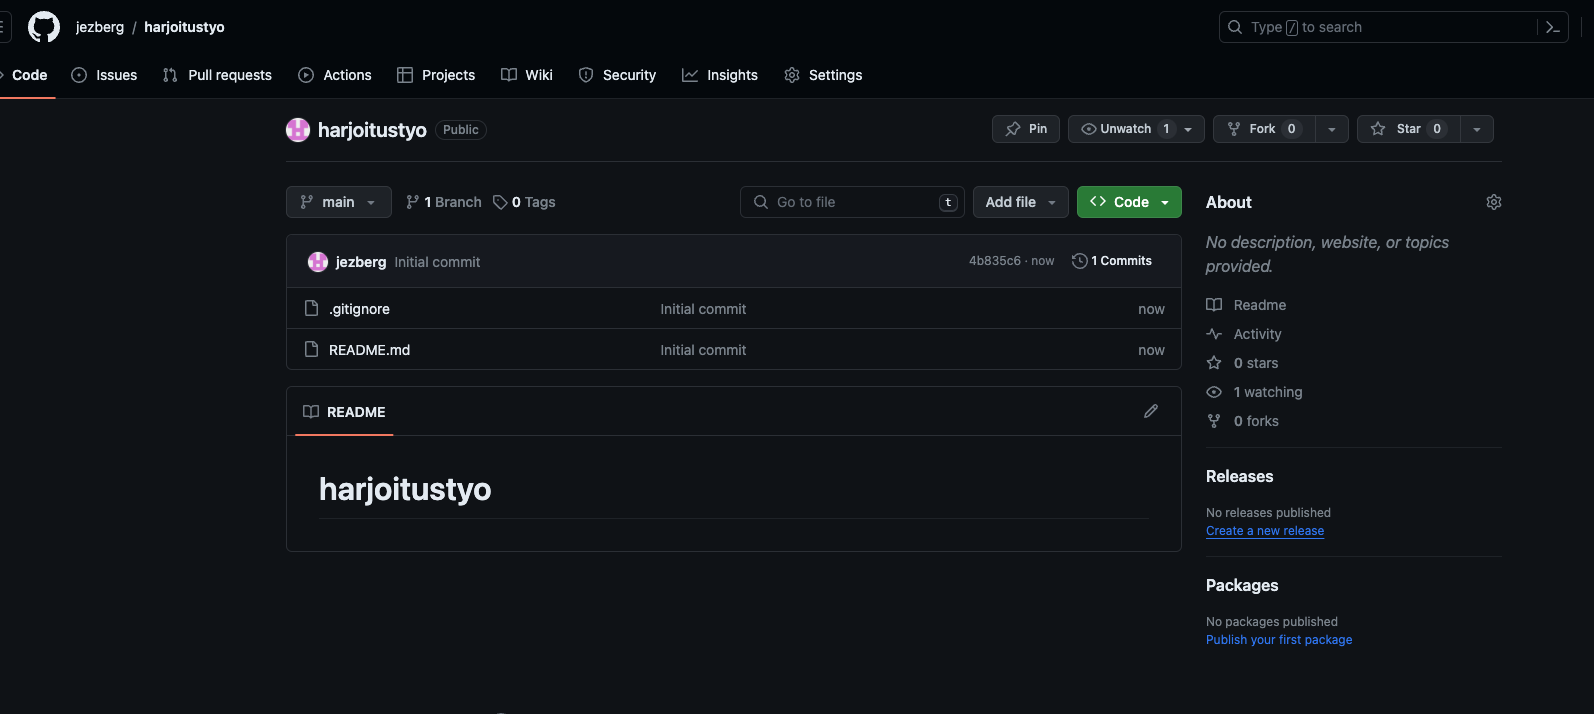
Navigate to the repository you created on GitHub. You can access it from the homepage after logging in by clicking on the repository name.

Click the “Code” button, and select “SSH” in the pop-up window.

Copy the repository URL that appears, which should be in the format: git@github.com:your-username/project-name.git You can copy the address by clicking the symbol next to it.
Open the command line and clone the repository to your computer using the command git clone "repository-url"
jezberg@LM2-500-27156 Documents % git clone git@github.com:jezberg/harjoitustyo.git
Cloning into 'harjoitustyo'...
remote: Enumerating objects: 4, done.
remote: Counting objects: 100% (4/4), done.
remote: Compressing objects: 100% (3/3), done.
remote: Total 4 (delta 0), reused 0 (delta 0), pack-reused 0
Receiving objects: 100% (4/4), done.
jezberg@LM2-500-27156 Documents %
If you encounter an SSH-related error, go back to the previous section.
In the command line, navigate to the folder you just cloned using the command cd project-name
You can list all the files with the command ls.
The README file should be visible when you run the ls command.
jezberg@LM2-500-27156 Documents % cd harjoitustyo
jezberg@LM2-500-27156 harjoitustyo % ls
README.md
jezberg@LM2-500-27156 harjoitustyo %
If the README is not visible, you forgot to select “Add a README” during repository creation.
Now, add all the files related to the project to this folder. They can be pushed to GitHub from there. Next, we will practice using Git with three exercises.
Repository Exercise 1: Editing
Make sure you’re in the repository folder in the command line.
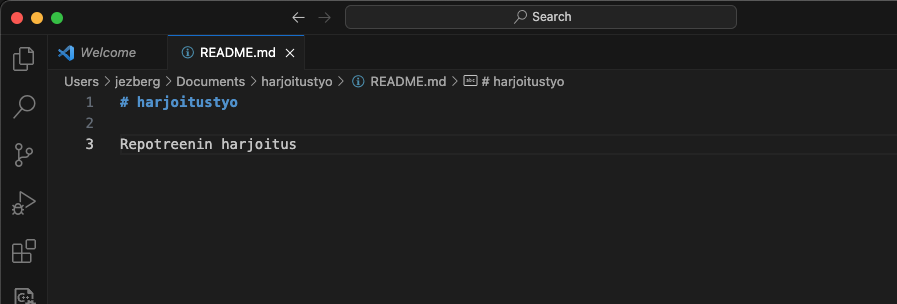
Open the README file with any text editor you prefer.
Write something in the file and save it.

Run the following command in the command line: git status
Now, you should see a list of the files you’ve modified (marked as “modified”), in this case, the README file.
jezberg@LM2-500-27156 harjoitustyo % git status
On branch main
Your branch is up to date with 'origin/main'.

Changes not staged for commit:
  (use "git add <file>..." to update what will be committed)
  (use "git restore <file>..." to discard changes in working directory)
	modified:   README.md

no changes added to commit (use "git add" and/or "git commit -a")
From this, you can see that the README.md file has been modified since the last commit. To commit (save) these changes, we generally first need to add the modified files to the commit and then commit them with a descriptive message. However, if we want to save all changes, we can use the -a flag with the commit command. You can directly write the commit message using the -m flag.
jezberg@LM2-500-27156 harjoitustyo % git commit -am "first modification"
[main 1351813] first modification
 1 file changed, 3 insertions(+), 1 deletion(-)
jezberg@LM2-500-27156 harjoitustyo %
If you forget to include a message with the commit command (e.g., “first modification”), an editor will open (most likely Vim or Nano) where you can write your commit message. If you’re not familiar with using the editor, you can exit it by typing q.
Then, re-enter the commit command with a proper message.
The changes you’ve made (modifying the README file) are now in your local repository. To push them to your GitHub repository, use the following command:
git push
jezberg@LM2-500-27156 harjoitustyo % git push
Enumerating objects: 5, done.
Counting objects: 100% (5/5), done.
Delta compression using up to 8 threads
Compressing objects: 100% (2/2), done.
Writing objects: 100% (3/3), 311 bytes | 311.00 KiB/s, done.
Total 3 (delta 0), reused 0 (delta 0), pack-reused 0
To github.com:jezberg/harjoitustyo.git
   4b835c6..1351813  main -> main
If git push gives the message “Permission denied (publickey)”, try generating the SSH key again or use the command ssh-add.
Go to your repository view on GitHub (as mentioned in step 1 of the previous instructions) and refresh the page. You’ll notice that the changes you made to the README file are now on GitHub, along with the commit message you provided!

Repository Exercise 2: Adding a File
Navigate to your repository folder in the command line.
Run the command mkdir test-folder
This will create a new folder called test-folder.
Next, add a file to the folder: Find the folder you created on your computer and either create or move e.g. a text file into it.
jezberg@LM2-500-27156 harjoitustyo % mkdir test-folder
jezberg@LM2-500-27156 harjoitustyo % ls
README.md	test-folder
jezberg@LM2-500-27156 harjoitustyo % vim test-folder/test-file.txt
jezberg@LM2-500-27156 harjoitustyo % ls
README.md	test-folder
jezberg@LM2-500-27156 harjoitustyo % ls test-folder/
test-file.txt
To add the folder you’ve created to version control, run the following command in the command line:git add test-folder
Now, Git will track your folder, meaning that it is visible with the git status command. You can also commit it to the local version control.
Note: An empty folder will not become tracked by Git with the add command.
Next, commit the changes by running the following command:
jezberg@LM2-500-27156 harjoitustyo % git commit -m "new test file"
[main 96644ec] new test file
 1 file changed, 1 insertion(+)
 create mode 100644 test-folder/test-file.txt
Note that the -a flag is not needed here because we previously used the git add command. It’s important to remember that the -a flag with the commit command does not add new files; it only saves changes to files that have already been added. In other words, when adding new files, you must always use the git add command separately.
Run command git push.
Then, check your repository view on GitHub to confirm that your new folder and the file inside it have appeared.

If you want to add multiple files at once, you can use the command git add.
This will add all new files in the current folder (.) to version control.
Now you know how to add files and folders to GitHub: add - commit - push! Follow the same process to create a documentation folder for your project and add the necessary documentation for the first week inside it.
Repository Exercise 3: Pull - Fetching Changes from GitHub
If you are working on multiple computers, version control helps keep your project up to date without having to transfer files from one device to another, such as using a USB stick. This is one of the benefits of version control! In this exercise, you will practice copying files from GitHub to your local machine using a second repository clone folder. In a real-world scenario, this second clone folder would be on a different device. You don’t need the second clone (shadow-repo) for anything other than this exercise.
Create another clone of the repository with a different name (e.g., shadow-repo) by running the following command in the command line:
git clone git@github.com:your-username/project-name.git
jezberg@LM2-500-27156 Documents % git clone git@github.com:jezberg/harjoitustyo.git shadow-repo
Cloning into 'shadow-repo'...
remote: Enumerating objects: 11, done.
remote: Counting objects: 100% (11/11), done.
remote: Compressing objects: 100% (7/7), done.
remote: Total 11 (delta 1), reused 6 (delta 0), pack-reused 0
Receiving objects: 100% (11/11), done.
Resolving deltas: 100% (1/1), done.
The clone is created just as in the section on preparing the repository for use, except now you name the clone folder yourself.
Modify the README file in the original repository. Then, run commands add, commit, and push in the original repository clone folder to ensure your changes are pushed to GitHub.
jezberg@LM2-500-27156 harjoitustyo % echo "exercise three modification of readme\n" >> README.md
jezberg@LM2-500-27156 harjoitustyo % git commit -a -m "Exercise3"
[main b1ecdc0] Exercise3
 1 file changed, 1 insertion(+), 1 deletion(-)
jezberg@LM2-500-27156 harjoitustyo % git push
Enumerating objects: 5, done.
Counting objects: 100% (5/5), done.
Delta compression using up to 8 threads
Compressing objects: 100% (3/3), done.
Writing objects: 100% (3/3), 383 bytes | 383.00 KiB/s, done.
Total 3 (delta 0), reused 0 (delta 0), pack-reused 0
To github.com:jezberg/harjoitustyo.git
   96644ec..b1ecdc0  main -> main
Here, the first command adds the line “exercise three modification of readme” to the README file. Note that a separate add command is not needed because README is already under version control.
Go to the shadow repository you created at the beginning of this exercise. Now, open the README file in this new repository, and you will notice that it has not changed.
jezberg@LM2-500-27156 shadow-repo % cat README.md
# harjoitustyo

Repotreenin harjoitus%
Pull the changes you made in your original folder from GitHub to the shadow repository with the command:
git pull.
jezberg@LM2-500-27156 shadow-repo % git pull
remote: Enumerating objects: 5, done.
remote: Counting objects: 100% (5/5), done.
remote: Compressing objects: 100% (3/3), done.
remote: Total 3 (delta 0), reused 3 (delta 0), pack-reused 0
Unpacking objects: 100% (3/3), 363 bytes | 72.00 KiB/s, done.
From github.com:jezberg/harjoitustyo
   96644ec..b1ecdc0  main       -> origin/main
Updating 96644ec..b1ecdc0
Fast-forward
 README.md | 2 +-
 1 file changed, 1 insertion(+), 1 deletion(-)
jezberg@LM2-500-27156 shadow-repo % cat README.md
# harjoitustyo

exercise three modification of readme
You will notice that the README file updates according to the changes you made in the original clone! Check this again in the README file located in the shadow repository.
Git & NetBeans
Git and NetBeans are good friends. Use the repository clone folder on your computer as the storage location for your NetBeans project: set the “Project Location” in NetBeans to the repository folder on your computer. Now, you are saving your project directly into the repository folder all the time.
After first navigating to your repository folder in the command line, enter the command: git status
You will notice two new files: your project file and the .gitignore file. The latter is created by NetBeans and contains a list of files that should not be included in version control. It must be added to version control. You do not need to understand the file in detail, but if you want to or if the file did not generate automatically, you can find a short .gitignore explanation at the end of this document.
Now, add the files with the commands git add project-name, and git add .gitignore.
At this point, running git status should display both your project and the .gitignore file.
Next, commit and push the changes. Your project is in your GitHub repository, and you can start working on it!
Summary
- When starting on a new computer, create an SSH key and clone the desired repository to your machine.
- At the beginning of your work session, pull the latest version of your project from GitHub.
- When making changes, add new and modified files and commit with a descriptive message.
- Think of the add + commit combination as saving your work. It’s better to commit too often than too little.
Use
git statusto check what you have modified and what is staged for commit. If issues arise, you can revert to an older commit, even one from a week ago.
- Think of the add + commit combination as saving your work. It’s better to commit too often than too little.
Use
- Before finishing your session, push (push) your changes to GitHub.
- Always verify in your browser that all changes have been uploaded to your repository; otherwise, instructors won’t be able to see them.
- Your repository also serves as a backup of your work - if your computer fails or servers of the department act up, all your hard work is safely stored on GitHub!
- To remove a file from the repository, use
git rm filename. Be careful! This command also deletes the file from your local repository (on your computer).
REMEMBER: Your GitHub repository is public. The whole world can see it. Do NOT upload sensitive information, such as your student number. Now, you can continue your project from any computer exactly where you left off last time.
Short .gitignore Guide
.gitignore is a file that contains information about which files and folders should not be included in version control or pushed to GitHub. These are specified as rules, with each rule on its own line. Typically, these files are generated by development environments on every run or contain sensitive information that shouldn’t be stored in version control, as they may take up space or be visible to everyone. The .gitignore file itself should be pushed to GitHub, as it defines what should be excluded from version control.
NetBeans automatically creates a .gitignore file when you create a NetBeans project in a folder that is already a repository. NetBeans adds a rule for /project-folder-name/nbproject/private/ to prevent files generated by NetBeans during the compilation and execution of your program from being included in version control. This means that changes in the private/ folder won’t be detected by the git status command.
If, for some reason, NetBeans didn’t generate this file, you can create it manually.
Create a text file named .gitignore (note that the file has no extension). Inside the file, add the following two lines: /project_folder_name/nbproject/private/ /project_folder_name/nbproject/dist/ You can also add your own rules to the .gitignore file. Each rule should be placed on a separate line.
More examples of the rules:
- http://git-scm.com/docs/gitignore
- https://help.github.com/articles/ignoring-files
- http://cfmumbojumbo.com/cf/index.cfm/coding/git-giving-files-the-cold-shoulder-gitignore/
Allowing Issues
Course peer feedback will be provided via GitHub Issues. To receive feedback, you must enable issue creation by following the instructions below.
- Go to your repository.
- Click on Settings at the top.

- On the Settings page, check the Issues box (see image below). The settings will be saved automatically.

Fix This Page
Make an suggestion for an improvement by editing this file in GitHub.